Introduction
Morse Code is an application for Windows 10 (or newer) that can translate texts to Morse code or vice-versa. It has also a learning module so you can learn the Morse code yourself. The app is free and without ads.
Where can I download it
- Windows 10/11: Download Morse Code application from Microsoft Store.
- Tip: The application has also a version for Android. You can find it in the Google Play Store (recommended), or if you have a Huawei device, you can download it also from Huawei AppGallery.
Requirements
Windows 10 or newer are required. Older Windows versions are not supported.
Detailed user guide
The following sections describe all parts of the app in detail. Besides the list of all features, you can find there useful tips how to use the app.
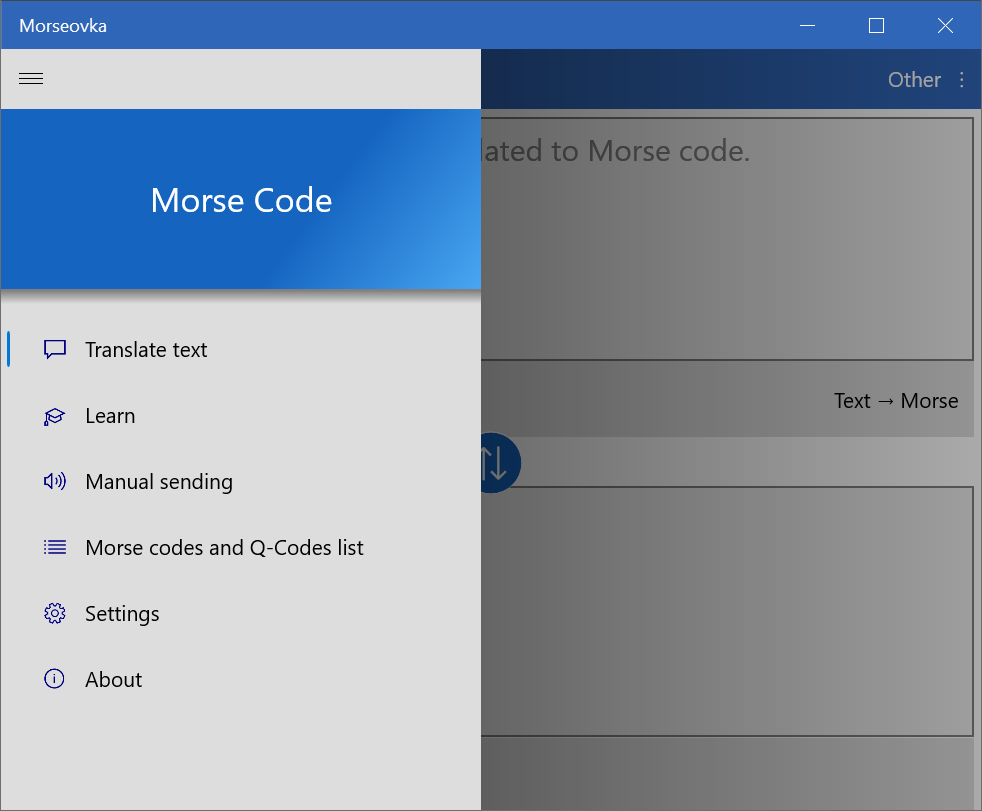
Use the Menu button (three horizontal lines) in the upper left corner of the screen to access various functions.
Translator
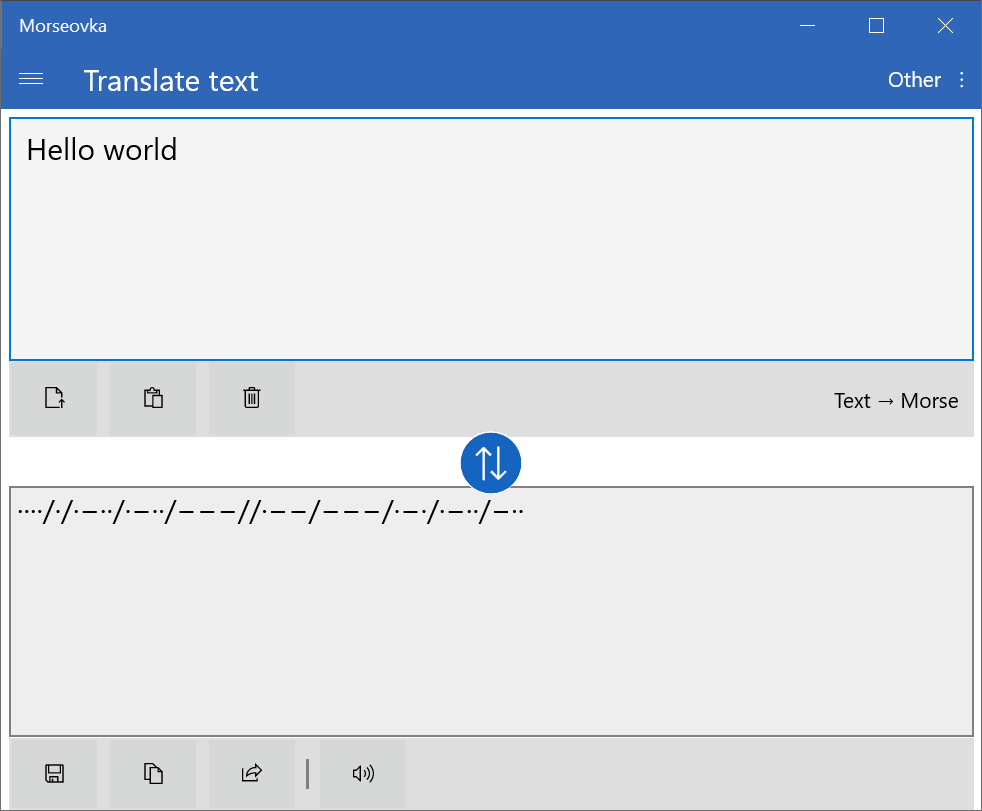
It is very easy to translate any text with this application. Just start typing. The application determines automatically if you have typed a Morse code and you want to translate it to the text or vice-versa. The text is translated as you type. While Morse code does not distinguish between upper and lower-case letters, this application has an intelligent formatting, which makes sure that the sentences will start with an upper-case letter.
This application uses a slash (/) to divide individual letters in the Morse code by default. The words are then divided by two slashes (//). This is much easier to read compared to the alternative that uses spaces as separators. However, if you prefer spaces, you can customize this in the Settings menu.
It is easy to get the text for the translation into this application. You can paste it from the clipboard. The app can also load a text from a text file.
The final translation can be shared just as easily. You can copy it to the clipboard, or you can save to a file, or you can use the Share button to send the translated text to another application.
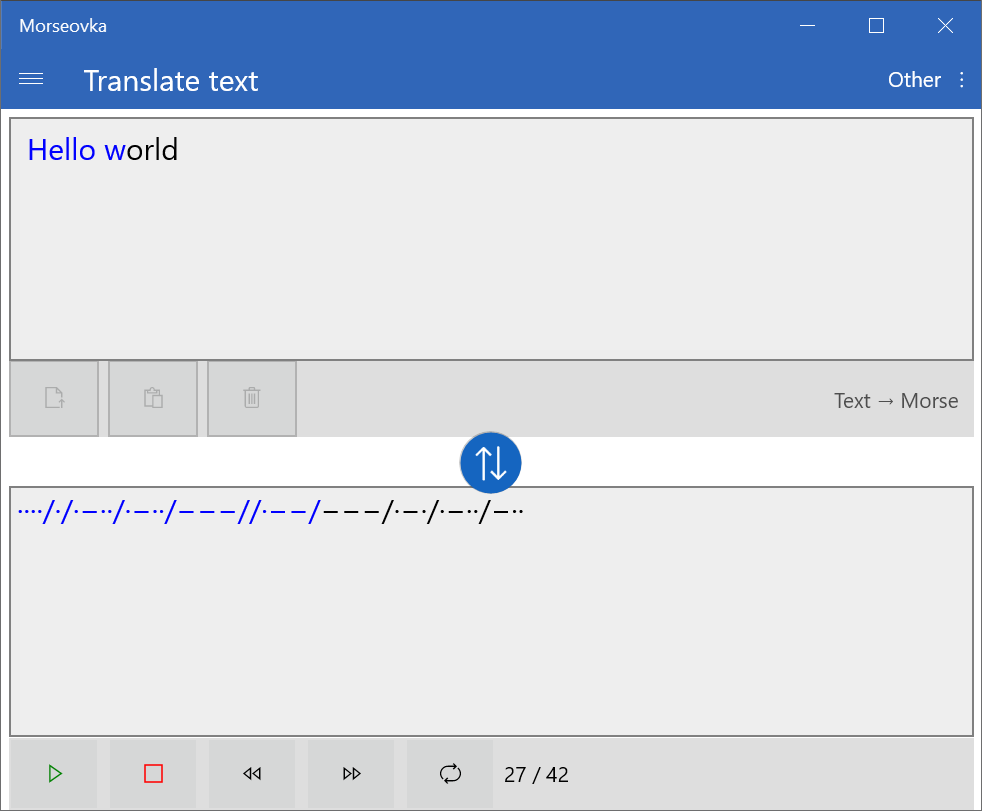
The Morse code can be also transmitted using the speaker. You can adjust the transmission speed, frequency and other parameters in the Settings menu.
The translator supports also amateur radio Q-codes. When you enter a Morse code and a Q-code is found in it, the meaning of this Q-code is added next to it in the brackets. This function can be turned off in the settings if you do not want to use it.
Tip: There are many icons. Move the mouse over any of them and hold it there to reveal a help text describing what the icon does.
Tip 2: If you are translating a Morse code and the result is not correct, please check in the Settings if the correct separator for Morse code is set (a space or a slash) and if the correct version of Morse code is set (select International Morse code if you want the result in Latin characters).
Other functions: In the upper right corner of the screen, there is an "Other" button. Click it to open a menu with other functions that can be useful for training Morse code on longer texts.
- You can find there a random text generator.
- There are also functions for hiding the text and/or its translation. You can for example generate a random text, hide it and/or its translation and try to translate it on your own. You can also let the app to transmit the hidden text using the speaker so that you can practice listening. You can reveal the text any time to check if your guess was right.
- A few simple ciphers are also supported. You can swap the dots and dashes, reverse the Morse codes, or you can choose a password and encrypt your message using Vigenère cipher. Please keep in mind that this is an older cipher intended for games or having basic privacy on a public channel. It is not suitable for transmitting secrets. However, it is much more convenient for Morse code than modern cryptography methods because it is more forgiving to mistakes - each incorrectly transmitted Morse code will corrupt just one character in the decrypted message, while the modern methods could make the whole message unreadable in case of a single mistake.
- The menu item Generate audio file generates an audio for the message that you have in the translator and saves it as an audio file. A dialog is shown that summarizes the duration of the audio in minutes and seconds and also the estimated size of the file in MB. You can select also the preferred format in this dialog. By default, WAV files are generated. This format is simple and well-supported. Its disadvantage is that it is not compressed so it can be quite large for longer messages. You can select the M4A (MP4 audio) format instead in this case. It can take longer to generate it but it will be much smaller. After confirming this dialog, you can select where you would like to save the file. If you need to adjust the speed, tone frequency or other parameters, you set them on the Settings page (accessible through the main menu).
Learning
Besides translating Morse code, this application can also teach you the Morse code.
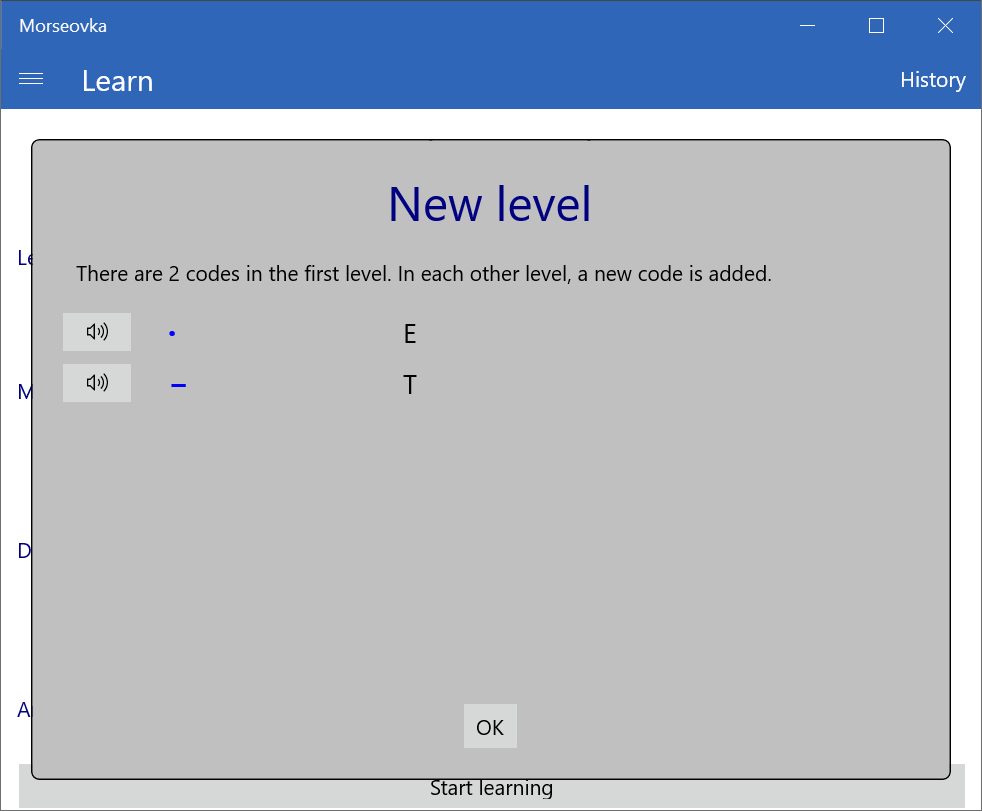
The learning is divided into levels. In the first level, there are only two simplest letters (E and T). In every other level, a new letter is introduced. The letters are added from the simplest ones to the more complex ones. This way you can learn all letters, continuing with numbers and other special symbols.
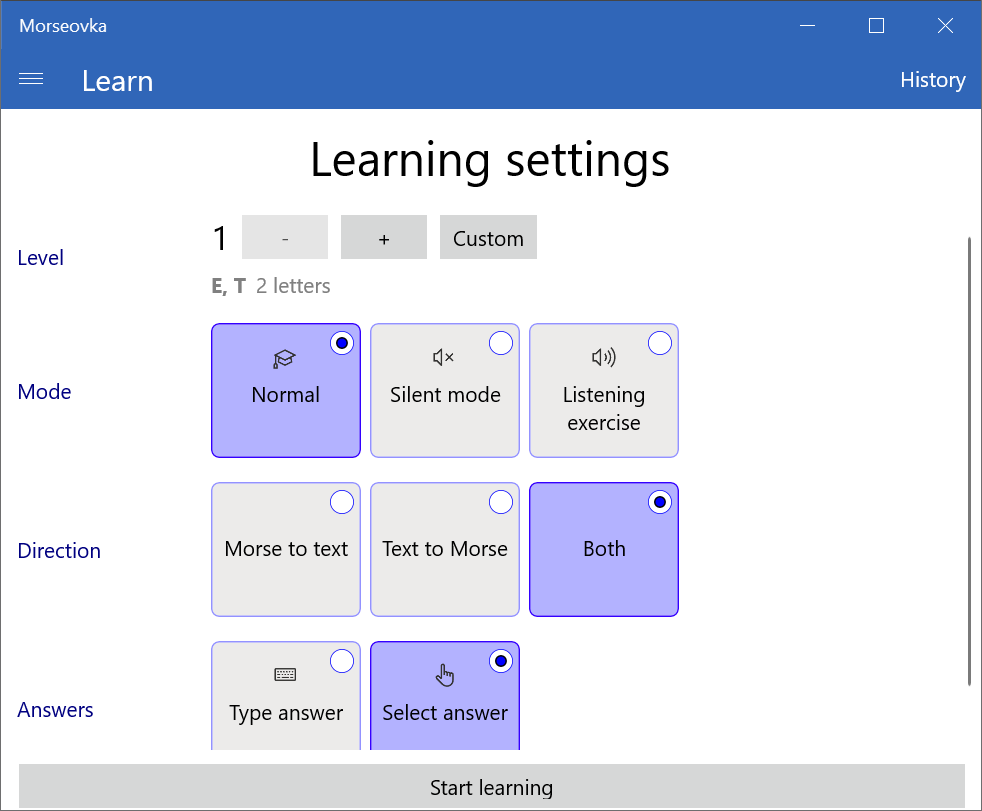
Before you start learning, you can choose various parameters such as:
-
Level - The choice of the level is completely up to you. There are pre-defined levels, which are sorted so that you would learn the easiest Morse codes first and you would continue with gradually more difficult Morse codes. If you are a complete beginner, select the first level.
If you want to learn a specific set of characters instead (e.g. only all numbers) and none of the standard levels fits your needs, you can click on the Custom button and select a custom set of characters. Click on any of the characters to select it, or unselect it. When you are ready, confirm your choice with the OK button below. Later, you can click on the Edit button to change your choice of characters, or you can click on the Cancel button to discard the characters that you have selected and return back to pre-defined levels.
- Mode - There are three modes available. They affect the way how Morse codes are presented to you. The default value is Normal mode. In the normal mode, the Morse code is both displayed on the screen and played using the speaker at the same time. This way you are also memorizing the sound of the Morse code, which is very important for the learning. If you don't want to disturb people around you and you do not have any headphones, you can choose the Silent mode. In the silent mode, the Morse code is displayed on the screen without playing it automatically (you can still click on the Play button to play it manually). And finally, if you want to make the learning a little more challenging, you can try Listening exercise mode. In this mode, the Morse code will not be displayed at all and you will need to recognize it only by its sound. Because different modes affect only the way how Morse codes are presented to you, they are applied only when you are translating a Morse code to plain text. In the opposite direction (plain text to Morse code), the setting is ignored.
- Direction - You can choose if you want to translate text to the Morse code, a Morse code to the text, or both.
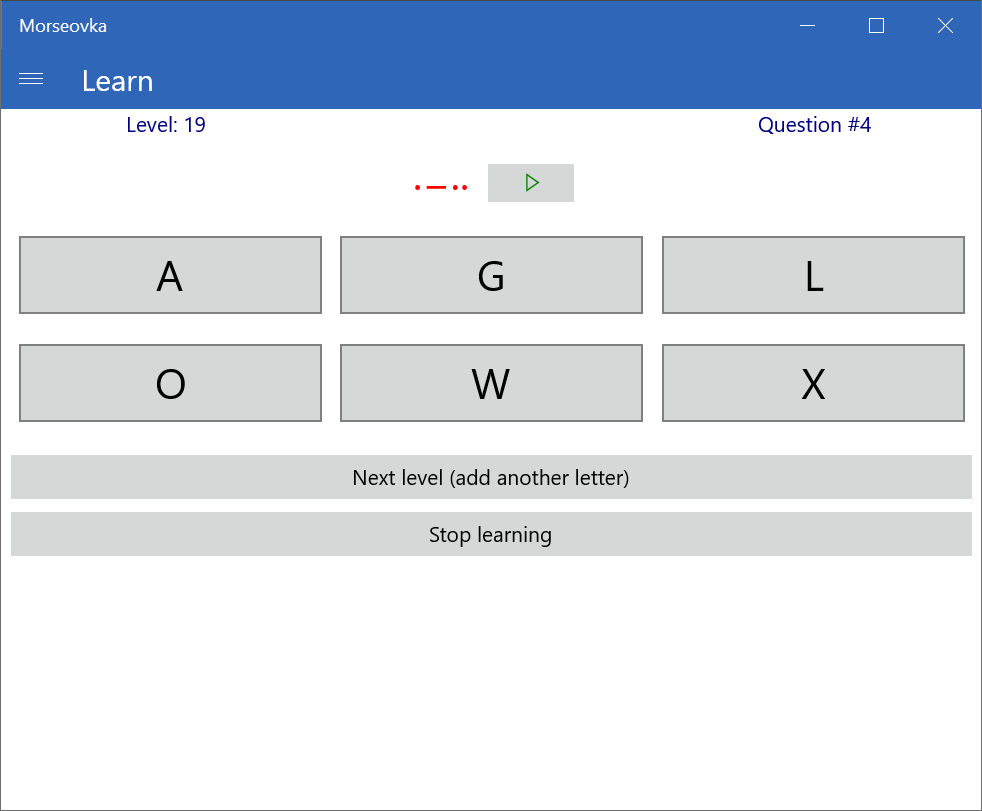
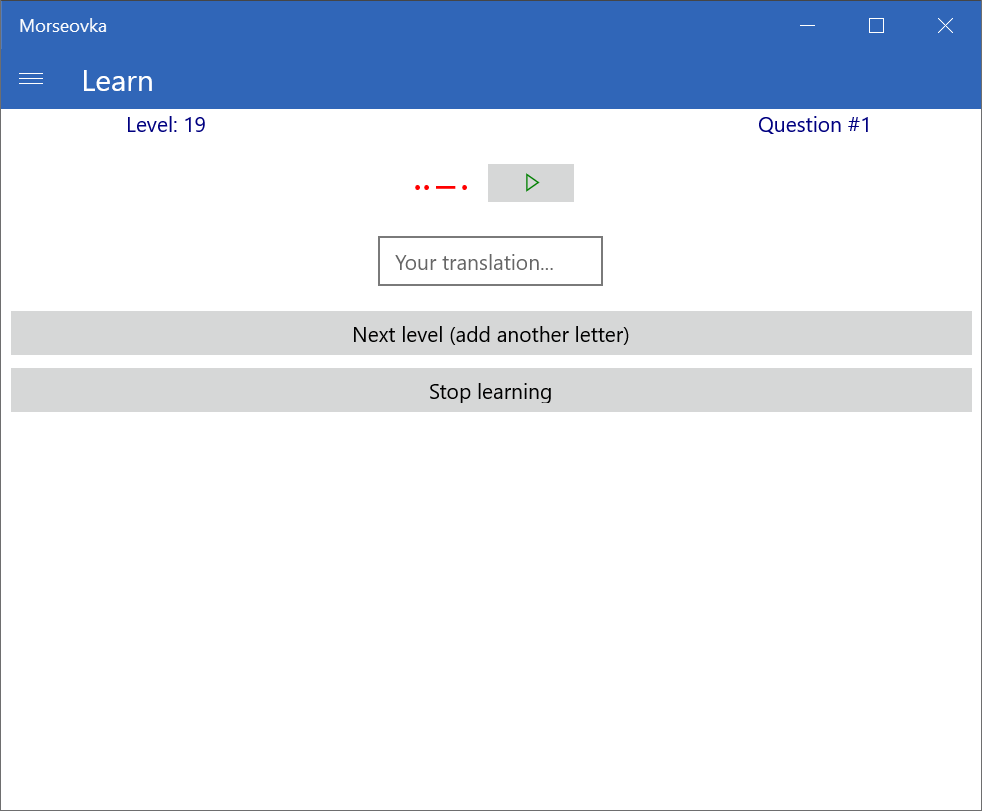
- Answers - You can customize how you would like to answer the questions. One way is that multiple-choice questions are used. In that case, a few possible translations are presented to you and you would just select the correct one. This way, you can answer the question quickly without typing. The other possibility is to type the answer. There is also a special mode called "Send by a button". This mode is similar to "Type answer" mode but instead of separate dot and dash buttons, only one button is displayed. By short-pressing it you can add a dot, and by long-pressing it you can add a dash. This is a great way to practice sending. This mode is useful when you are translating to Morse code. It doesn't have much use when the opposite direction (Morse to text) is set.
- Other parameters that are used for the whole application can be set in the Settings menu. You can adjust the sound settings (speed, frequency, and volume) there. The sound settings can be modified also in the middle of the learning process (click the Menu button in the upper left corner, choose Settings, modify the sound settings and then click the Menu button again and select Learn to return back). You can also choose in the Settings if you want to have a certain time limit for answering questions, or you can fine-tune the behavior of the app during learning (for example, if the app should present you a new question immediately after answering the previous one). Finally, you can choose the version of the Morse code that you want to learn in the Settings. Basically, learning International Morse Code is recommended. This is the official one. But the app supports also many local versions of the Morse code (for example, Greek, or Russian that do not use the Latin script).
Start the learning by clicking on the "Start learning" button. You are presented a letter, or a Morse code. If you have chosen that you want to select an answer instead of typing it, up to 6 possible translations are presented to you and you just select the correct one by clicking on it. Alternatively, if you have selected that you want to type the full answer, you should fill in the translation into a text box. If "Send by a button" mode has been selected, short/long-press the big button at the bottom of the page to enter dots and dashes. The border between dot and dash is determined by the speed currently set in the settings. It's possible that you will need to adjust it for this mode (if you set a slower speed, the button would need to be pressed for a longer time to form a dash).
The Morse codes are selected randomly but each code can have different probability of being chosen. The new codes are selected more often than the old ones. The numbers of correct and incorrect answers for each code are also taken into account so the difficult codes will appear more often. The application is intelligent and it can also handle cases when you mistake one Morse code for another one. For example, if "-." appears and you translate it as "A" instead of "N", the application increases probability for both "A" and "N".
When you feel confident that you can translate all the letters from the current level easily, just click the button to move to the next level. Moving to the next level is up to you.
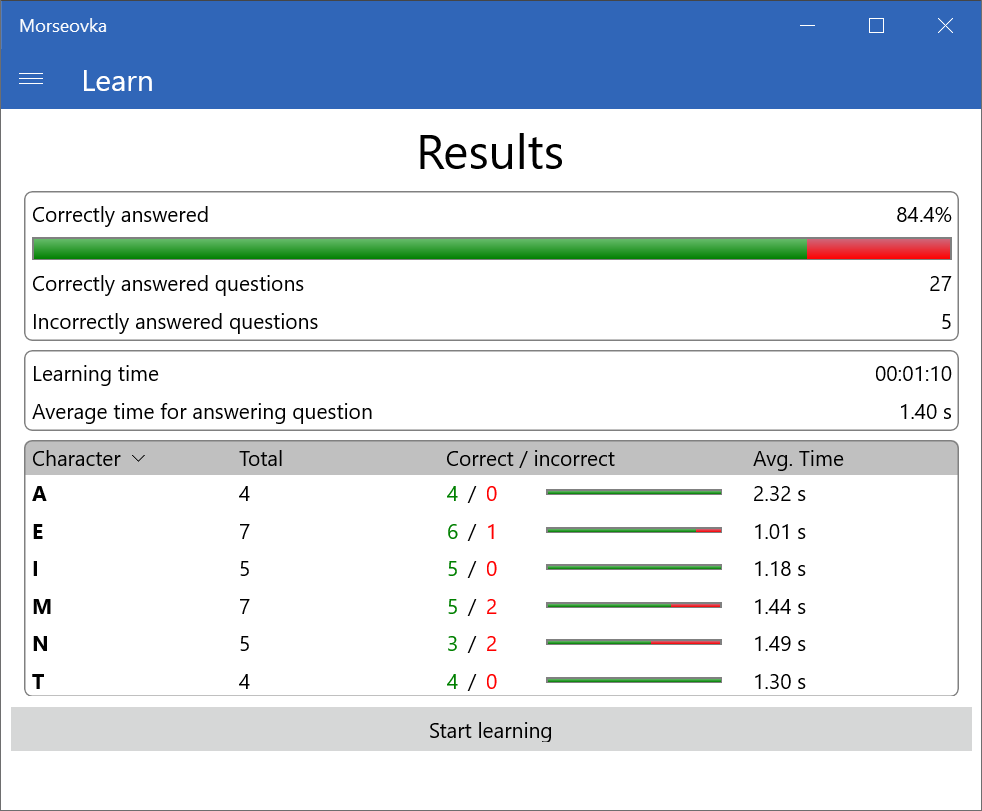
You can stop the learning any time by clicking on the "Stop learning" button. The results are then presented to you. You will find there the overall number of correct and incorrect answers, how much time did you spend with the learning, and what was the average time for answering the questions. Moreover, detailed statistics for each Morse code are also provided (total number, number of correct and incorrect answers, average answer time). You can order the results table by clicking on the header of any of its columns. If you click on the same column header again, the results will be ordered by this column but in the opposite order. This way, you can order the results so that, for example, the characters with the most mistakes would be listed first.
Learning tip:
- Leave the sound turned on whenever you can. If you want to receive the Morse code in a normal speed, then a lot of listening is the key. Your brain should build a direct connection between the sound and the corresponding Morse code - almost like a reflex without thinking. Because when the letters will go one after another in a quick pace, there will not be enough time for thinking.
- Set the transmission speed to your target speed. If you plan to be able to receive 20 WPM (words per minute), set this speed. Starting with a much slower speed is generally not recommended. The reason is that the Morse code in, for example, 5 WPM sounds very different compared to 20 WPM, so by setting a much slower speed you are learning a "wrong" sound.
- When you are ready, start practicing also translating longer texts. If you already know the individual letters, you can switch to the translator and click on the "Other" button in the upper right corner. This icon opens a menu with other function that can be used for training. The app can generate a random text. You can hide it and let the app to transmit it using the speaker. This way you can practice listening. Any time, you can reveal the text to check if your guess was right. It is very likely that you will find out it is very difficult to recognize longer texts because the characters are transmitted too fast. In that case, go to the settings menu, enable Farnsworth speed there and set it to a low value. For example, leave the default speed of 15 WPM, but set the Farnsworth speed to only 3 WPM. This will make the gaps between letters five times longer giving you more time for thinking. Receiving should be easier now. As you are getting more experienced, try to increase the Farnsworth speed slowly until it is same as the normal speed.
Tracking your progress
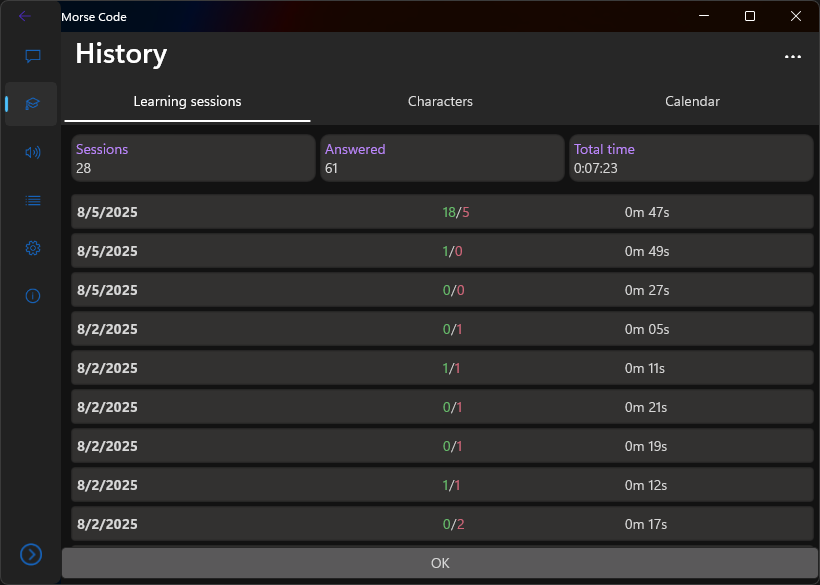
Your results from each learning sessions are saved so that you can track your progress later. To view the learning history, click on the History button in the upper right-hand corner of the screen (it is on the page where you can set the level and other parameters before starting a new learning session). There are three tabs, which offer different views on the learning history.
-
The first tab (Sessions) contains the list of all the learning sessions ordered by date. The top of the page shows the summary with three numbers:
- Sessions - it is the total number of learning session.
- Answered - the total number of the questions that you have answered so far.
- Total time - it is the total time that you have spent learning Morse code in this app.
Below these numbers, there is a complete list with all your learning sessions. For each of them, the date, the number of correct/incorrect answers and the duration is displayed. You can view the detailed results for any session by clicking on it.
You can also delete the whole learning history by clicking the "Clear all" button in the upper right-hand corner of the screen, or you can also delete just one of the session by clicking on it to view the details, and then clicking on the "Discard this session" button on the session details page.
-
The second tab (Characters) shows the history for each of the characters. There is a summary on the top of the page:
- Number of characters - it is the total number of characters that has been learned.
- The first learned - the character or characters that have been added into the learning first.
- The most recently learned - the character or characters that have been added into the learning the most recently.
There is a list of all characters below the summary. For each character, there are numbers of correct/incorrect answers, the date when the character appeared in the learning for the first time, and the date, when this character has been reviewed the last time. You can view the detailed results for any of the characters by clicking on it.
-
The last tab (Calendar) shows the history in form of a calendar. Each day when you have been learning Morse code is marked by a dot.
Clicking on any of the days shows more details for this day under the calendar. The number of answers is shown as well as the total time that you have devoted to learning.
In the upper right-hand corner of the page, there are links for the following features:
- Clear all - The whole learning history will be deleted.
- Export history - The learning history will be saved to a file. This is handy when you want to have a backup or when you want to transfer your history to a new computer.
- Import history - The learning history will be loaded from a file. Only new learning sessions will be imported (the comparison is done using the date and the time of a learning session). The learning sessions that are already in the app will not be imported twice; they will be skipped.
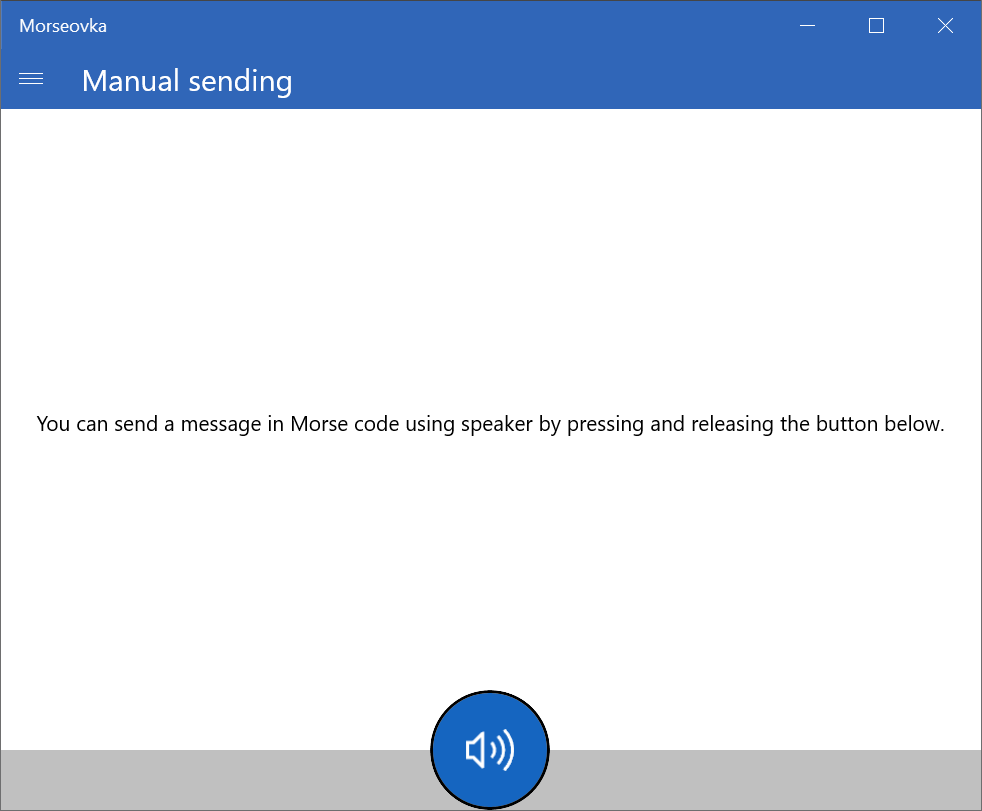
Manual sending using the speaker
The page contains a single button that you can use to send your message in Morse code using the speaker. When the button is pressed a tone is played on the speaker. Releasing the button turns off the speaker. Instead of clicking on the button, you can also use spacebar or the key S on your keyboard.
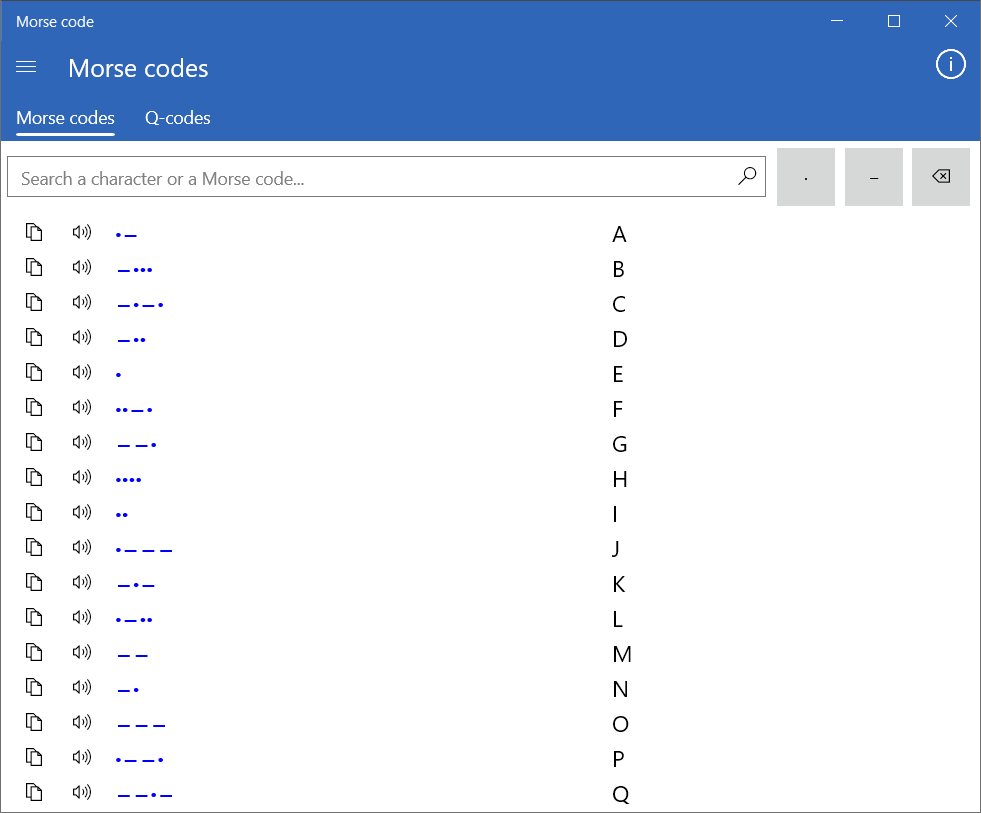
List of characters
All letters and the corresponding Morse codes are displayed in a single table. You can quickly look up any code. Just type the searched letter or its Morse code to the search bar.
There are two buttons in front of each code. The first button can be used to copy the code into the clipboard. The second button plays the Morse code using the speaker.
Beside official codes (listed in the ITU-R recommendation), there can be also unofficial Morse codes. The app supports them so that if you receive a message with an unusual non-official Morse in it, you can look up its meaning. The unofficial Morse codes are listed below the official ones and they are distinctively separated from each other. They are also displayed in a lighter color for even more distinction. Generally it is recommended to use only official Morse codes in your messages. Please, use the unofficial ones only if you are really sure that the recipient knows them. Keep on mind that one unofficial code can have multiple meaning (for example, ".-..-" can mean È, or Ł). That is another another reason to avoid the unofficial Morse codes when possible. The unofficial Morse codes are implemented in the app in the following way:
- Translator: If you are translating Morse code that contains unofficial codes, the translator will try to translate them (if they have multiple meanings, the first one is used). However, if you are translating a plain text to Morse code, the app will avoid using unofficial codes in the maximum degree so that your message could be translated by anyone. A few examples: if you receive a message with " .-..-", it will be translated as È, However, if you are composing a message and you type È, the translator will avoid using unofficial code by removing the diacritics and translating the letter as "." (E). Another example: there is no official code for the dollar sign. However, an unofficial code "...-..-" is sometimes used for it. If you type this code into the translator, it will translate it as "$". However, if you type "$" into the translator, it will transcribe it as "USD" so that it could translate it using official Morse codes only.
- Learning: The unofficial codes are excluded from learning. This is a deliberate decision because learning codes that can have multiple meanings or other people might not know them at all is not a good idea.
- List of Morse codes: The unofficial codes are included in the list but they are displayed so that the user can distinguish them easily for the official ones.
List of Q-codes
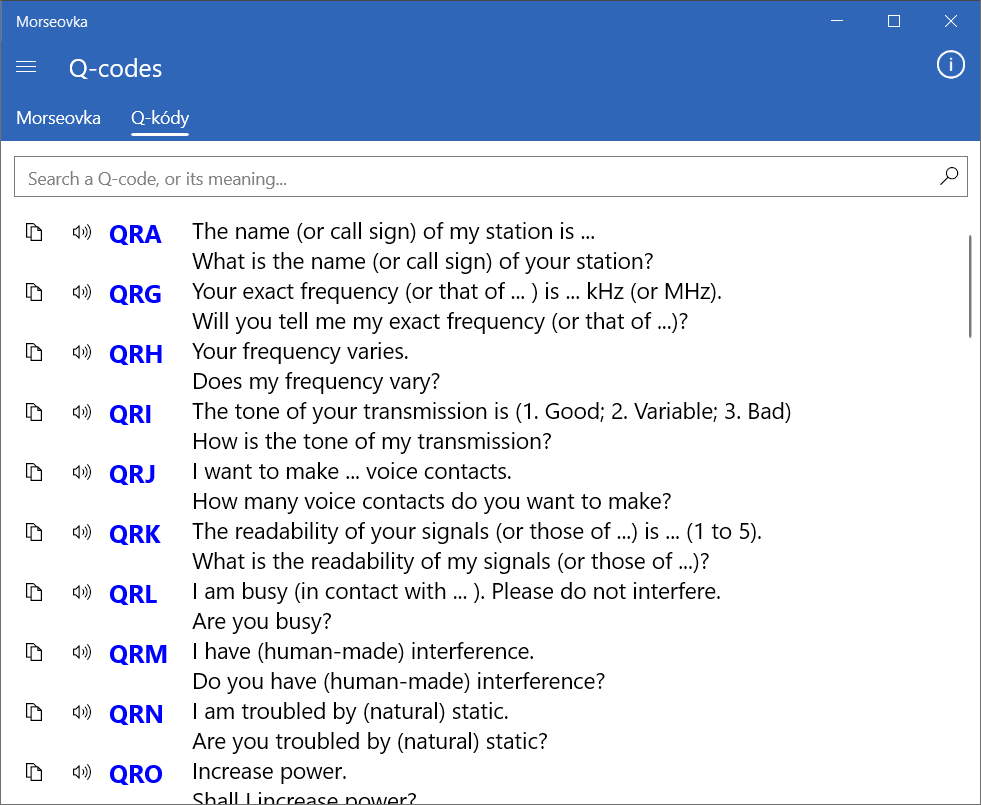
This application contains also a list of amateur radio Q-codes for more advanced users. The Q-codes are short codes beginning with the letter "Q". If a Q-code is followed by a question mark, its meaning is changed to a question. The app lists the Q-codes with their meaning. The meaning for both the statement form and the question form is displayed.
You can find the meaning of a code by entering the code into the search box. Alternatively, you can also search a code by its meaning.
Similarly as in the Morse codes list, there are two buttons in front of each Q-code - one plays the Q-code using the speakers, the other one copies it into the clipboard.
The translator also supports the Q-codes. If you enter a message in Morse that contains Q-codes the translator appends also meaning of the Q-code in the brackets.
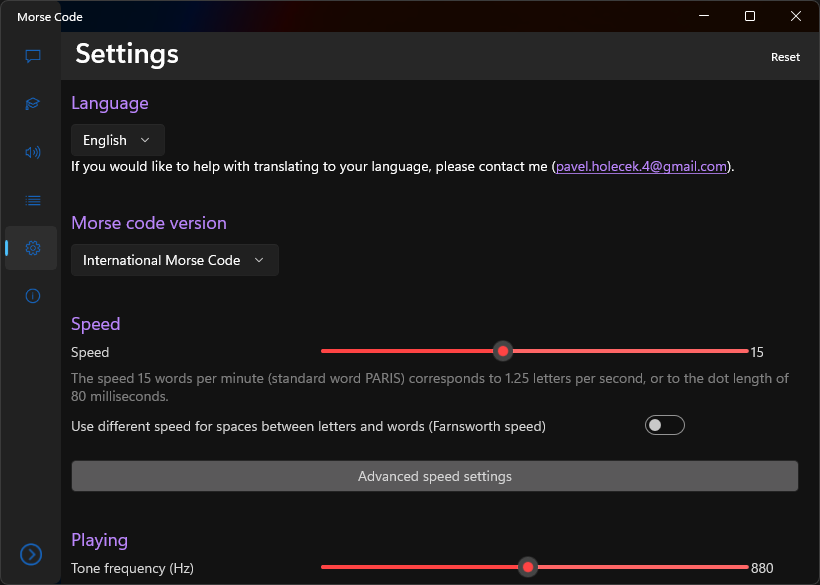
Settings
In the Settings menu, various parameters can be adjusted:
- Language - You can use this setting to switch the language. The current version of the app is available in English, French, Spanish, Portuguese, German, Bulgarian, Croatian, Italian, Romanian, Finnish, Norwegian (Bokmål), Czech, Slovak, Turkish, Simplified and Traditional Chinese, Vietnamese, Arabic, Hebrew, and Bengali languages. Moreover, Russian and Indonesian languages are supported, both as a preview version that might contain mistakes. Do you want another language to be added and are you willing to help with the translation? No problem. Please, write me to the mail pavel.holecek.4@gmail.com. Because Indonesian has been requested by many users, I have added at least automatic translation to Indonesian with Google Translate. As it is only an automatic translation, there will probably be some mistake. If you find one and would like to help by correcting it, please write me to pavel.holecek.4@gmail.com.
- Morse code version - There can be multiple variants of the Morse code. Use this setting to select one of them. The current version contains International Morse Code and a few local variants: German (it has additional codes for character such as "ü" and "ß"), Czech (there is a separate code for the "ch" letter), Greek (it uses the Greek alphabet instead of Latin script), Polish (it has a few additional codes for characters with accents), Russian (it uses Cyrillic instead of Latin script), Slovak (it has a separate code for "ch" letter, and it contains mnemonics for each code in Slovak), Ukrainian (it uses Cyrillic), French (it is the same as International Morse Code, but it contains mnemonics in French), Spanish (it has a few additional characters such as "Ñ"), Hungarian (there are a few additional codes for letters such as "á" and mnemonics), Korean (SKATS), Japanese (Wabun code), Arabic (it uses Arabic script), Hebrew (it uses Hebrew script), and Bulgarian (Cyrillic letters). Basically, if you want the official Morse code that is used around the world, select the International Morse Code.
-
Speed - These settings are used when a Morse code is played in the translator or in the learning module.
- Speed - The speed of the transmission in words per minute.
- Farnsworth speed - The Farnsworth speed (if it is enabled) is used for gaps between letters and words. To have a different speed for gaps is useful for practicing listening. If you are practicing using 15 WPM and it is too fast for you, you can enable the Farnsworth speed, leave the (normal) speed setting at 15 WPM, but set the Farnsworth speed to, for example, 5 WPM. This way the letters will be transmitted still at 15 WPM but the gaps between them will be 3 times longer giving you more time for thinking. This setting applies when you play the Morse code in the translator.
- Advanced speed settings - If setting the speed in words per minute (or specifying Farnsworth speed) is not enough, you can click on the "Advanced speed settings" button, which opens a dialog where you can set speeds for dots, dashes and various separators in milliseconds according to your needs. If you want to return back to the standard way of setting speed later, you can click on the "Cancel the advanced settings" button.
-
Playing - These settings are used when a Morse code is played in the translator, in the learning module, or by the manual
sending function.
- Tone frequency - Frequency of the tone in hertz (Hz)
- Volume - You can adjust this setting if you want a quitter or louder sound.
- Added noise - The white noise is added to the sound. You can set its amount with this slider. Lower values can help to solve problems with some Bluetooth headphones. Higher values can be used to simulate a radio distortion.
- Use the older version of sound player in the translator - The sound in the translator is played character by character. With the sound player used in the older versions, there could be very small extra delays between dots and dashes when the system decided not to play the sound immediately and do something else instead. This way, the Morse could be played with a lower speed than the one that you have selected in the settings (with gaps longer that they should be). The sound player has been rewritten completely and the new version should reduce these delays significantly. It is recommended to use the new version. However, if you have any problems with the new sound player, you can revert back to the older one by enabling this setting. This setting affects only sound in the translator. The sound in the learning module is played in a different way (as a single sound file) so its timing should be always perfectly accurate.
-
Preferred separators in the Morse code - There is no standardized way how to divide individual letters and words in the written
form of the Morse code. There are three formats that can be seen most often. You can select the one that you prefer:
- A slash between letters, and two slashes between words - This is the recommended format that is easy to read.
- A space between letters, and two spaces between words
- A space between letters, and a slash between words
-
Translation - These settings are used for the page with the translator.
- Auto-detect translation direction - When you type a text in the translator, the app will determine if it is a Morse code or not and sets the translation direction automatically as you type. If you don't like it, you can disable this feature and set the direction manually.
- Translate also Q-codes when translating from Morse - When you enter a Morse code into the translator and this function is enabled, the translator also looks for all Q-codes in message and append their meanings in the brackets. If you do not use Q-codes, you can turn off this feature. This will speed up translation from the Morse code.
- When the translation is shared, use simple dots and dashes for better compatibility - This setting allows you to customize the behavior in the translator if use the button to copy the Morse code to the clipboard or to send it to another app using the Share function. By default Unicode dots and dashes are used (for example "•−"). However, not all applications can handle these characters correctly. If you copy the translation to an app that might have problems with them, you can enable this checkbox. It will cause that the copied or shared translation will contain only simple dots and dashes instead of the Unicode ones (".-" instead of "•−"). They don't look great but you can be sure that all apps support them.
-
Learning settings
-
Time limit for answering - If you want to make sure that you answer quickly, you can turn on a time limit.
- Off - In this mode, you have as much time for answering as you want.
- Just for information - You can set a time limit (in seconds). There will be a countdown for answering each question but this is just for your information. You will be still able to answer even after the timeout.
- On - You can set a time limit in seconds. If you do not manage to answer in time, the question is automatically evaluated as incorrectly answered and the next question is shown.
- Evaluate the answer immediately during typing - If this function is enabled (it is by default), your answer entered in the text box is evaluated during typing. You do not have to confirm it, which makes the learning smoother and more comfortable. On the other hand, if you press a wrong key on the virtual keyboard accidentally, the answer is evaluated as incorrect. If you do not like this behavior and you want to have an opportunity to correct the mistyped characters, you can disable this function. When it is disabled, an "OK" button for evaluating the answer is displayed, and your answer is evaluated only after you press this button.
- Show the next question after a correct answer - If this setting is enabled, the next question is shown automatically after you answer the previous question correctly.
- Show the next question after an incorrect answer automatically - If this setting is enabled and you answer the question incorrectly, a short message with the evaluation of your answer is displayed, and then the next question is shown automatically. You can turn this off to have more time to review the correct answer. In that case, the next question will be shown only after you click on the "Next question" button.
-
Time limit for answering - If you want to make sure that you answer quickly, you can turn on a time limit.
-
Appearance
- Reverse the order of the dot and dash buttons - When a keyboard for entering Morse code is displayed, a button for the dot is displayed on the left and a button for the dash is displayed next to it on the right. Some users prefers the opposite order. If you enable this setting, the buttons will be reversed.
-
Error reporting
- Send reports for errors and crashes - If the app crashes, or another error occurs in the app, an anonymous crash report is sent to the developers so that we could fix it. No personal or sensitive information are sent. However, if you are very concerned about your privacy, you can prevent this by turning off this setting. There is also a link for viewing the privacy policy. You can click on it to review what data can be in the crash reports.
The upper right-hand corner of the screen contains RESET button. By pressing this button, all settings will be deleted and the default values will be set instead. The app will be restarted so it will be in the state as after its fresh installation with the only exception of the learning history, which will be preserved.
Privacy policy
You can find the detailed information on the privacy policy on a separate page.
Are you missing any feature?
If you are missing any feature, write me (pavel.holecek.4@gmail.com) and I can try to implement it in the next version. Any feedback is welcome!